Showing posts with label Create. Show all posts

Friday, August 22, 2014

A Little Project: The Letter "N"

Last year with my birthday money I bought a Silhouette Portrait on a screaming deal. I had ideas of what to do with it, but mostly I've used it to cut out paper to frame.

I've done a couple small vinyl projects, but when a friend found a letter "N" at Hobby Lobby in the clearance section for 90% off making it only $3, I could see exactly what I wanted it to be:


And now, working backwards...

This was just before the Krylon Short Cuts Gold Leaf Spray Paint was applied. Putting on the vinyl and figuring out what I wanted and how to do it took about 7 hours. Had I known, I may not have done a design that was so complicated.


This was just after the Krylon Dover White Spray Paint was applied.

 And this is what it looked like when I bought it (for $3). Gross.

 And this is what it looks like on my wall. I know the wall needs work, but I like the "N."

And here is a detail of the pattern...imperfections and all!

And here is how my visiting sister kept James out of the vinyl and spray paint. And being his photographer is how I kept her busy.

I love how it turned out and how it adds some sparkle into my decor!

A couple quick tricks:
• Your X-acto knife is your best friend! By the end of the "N" you really can't tell I pieced strips together because it took me so long figure out that an X-Acto knife was exactly the right tool for the job.
• I tried to use a cardstock stencil, but the lines were just not as clean as with vinyl that stuck all over and not just on the edges where I would have taped it.

Tuesday, October 29, 2013

My Signature Style

Since moving to a new house in a new place I have been just a bit obsessed with re-decorating and re-organizing. Of course, some of that is due to necessity (moving from a 900 sq ft condo to a 1500 sq ft house requires adaptation), but some of it is that I am really eager to settle into my own style.

For those of us who are decorating impaired, we go into other people's homes and think how great everything looks and how well it all coordinates, even if we wouldn't choose it for ourselves. The problem is, we have no idea how to transform things we see and like into beautiful decor for our homes.

Enter Fieldstone Hill Design and their Decorating for Dummies program...or more nicely said "Style Bootcamp"!

It's a completely awesome series on this blog that teaches you how to Overcome Decorating Paralysis (my biggest issue and the best post I've read on how to begin decorating), Define Your Style with Photos, and Make a Signature Style Board. I devoured these posts and will now delight you with my own style board that I made. Enjoy!


I now have a dedicated Pinterest Board to My Signature Style as a place to collect pictures of not just things that I like, but things I would be proud to have associated with me and my home. Going through this series (and blog) is a wonderful naptime (or more) activity that I highly recommend for all you decorating dummies out there.

Just so you know, my "Don't Buy Word" is cheap and just thinking about that one thing has really changed my shopping habits already. Don't get me wrong, I still love a bargain, but it has to be more than that before I'll take it home with me. So glad I came across this blog!

Friday, July 12, 2013

A Little Project: DIY Window Seat

Nick has been working late pretty much every night for the last 3 weeks...and a girl can only read so many books (especially when she's in a bit of a reading slump -- more on that later). Anyway, as I've been clearing out our home of stuff not going to New Mexico with us, I came across a little shelf in the garage, decided it was serving no practical purpose and decided to re-purpose it. This is what I came up with:


And this is what it looked like before:

 My thought was that if I'm going to try my hand at upholstery, I wanted it to be a no regret situation, just in case it went south. So this is actually a Walmart shelving unit we bought years ago for our specific needs and has been collecting dust and junk in our garage since we moved to our condo. If I ended up destroying it, nothing lost!

Which brings me to what I did and how I did it. Well, I followed this tutorial which was featured here and then I adapted it to my needs (like sanding everything down and then painting the unit because there was scuffs and chips and exposed particle board on the bottom of each shelf and the unit itself...we're cheap like that).


About the paint: I got a quart of Glidden Smooth Stone in Satin from Home Depot which ran me about $13. I wanted the color to have both grey and cream in it so it would mesh with whatever room we put it in (and there's quite a bit left in the can). I also took the 1/2 yard of fabric I got at Hobby Lobby for $2 so I could see them side by side.

The rest of the project was just like the tutorial, except I did end up buying the 1" thick roll of 6' long foam from Hobby Lobby, and using my 40% off coupon it ran me like $11. So the total cost for the project ended up being about $30, which I can do on my budget. Plus, I'm just pretty excited about how it turned out!


I know it's nothing really to write home about, but it filled two needs in our house (de-cluttering the garage and a small place for a few books in Alexa's room). It also filled a creativity and exploration bug in me, so now I'm cured for a while (until we move into a new place hopefully). Plus, with all that extra foam, it looks like I'm going to have to try another upholstery project!!

And now I can say I pretty much can woman-handle a drill. BAM!

AND I also proved once again that Pinterest can actually be a useful endeavor! YAY Pinterest!
(Speaking of...did you see our new social media buttons I put up on our sidebar?? Now we're a little social!)

Tuesday, March 12, 2013

Car Seat Canopy Tutorial for Sewing Dummies


Being a sewing dummy myself, I thought I would try to help those out there who may be new to sewing and want to do a fairly simple, cute, and useful project for their bambino (or a nice shower gift). I do link up to four different tutorials I used to make mine, so jump around to those ones if you'd like!

Notes to begin:
• the car seat I'm working with is a Baby Trend Flex-Loc Infant Carseat. Here is a link to a tutorial that fits a Graco car seat, and here's another one.
• I've inserted personal sewing-related notes in italics throughout the tutorial. Feel free to ignore them.


Needed Supplies
Coordinating Thread
1 Yard Top Fabric
1 Yard Coordinating Bottom Fabric
2 - 6"x8" Coordinating Fabric Pieces
2 - 2.5" x 8" Coordinating Fabric Pieces
2 - 1.5" x 3.75" Velcro Strips
2 Coordinating Buttons

 (thread not pictured because I forgot...oops!)

The Blanket Portion
(This is the fairly easy part, so let's start here.)

Step 1: Wash your fabrics on cold and dry on highest setting
 As a sewing dummy I have forgotten this step and cut my fabric first and then had to re-cut after I washed them. It's annoying. 

Step 2: Cut both fabrics to 33"x42" 
 When cutting, I find that it's easiest to lay one piece of fabric (right side up) on carpet, smooth it out, then lay the bottom fabric (right side down) then smooth them out together. Then I pick up both pieces and move them to a wood surface to cut with scissors. If using a rotary cutter and cutting pad, you could stay on the carpet to do your cutting. 

Step 2 (Optional Rounded Corners): Fold both fabrics together in half and then in half again so all corners are touching. Then get a plate and either (a) use your rotary cutter to cut off corners of your fabric or (b) mark where the plate meets the fabric with a pencil or fabric marker and then cut off corners with scissors.


Step 3: Unfold fabric pieces and pin the fabric pieces together.

 (Pinning not pictured because I forgot, and even for dummies, pinning fabric is pretty straightforward)

Step 4: Using a straight stitch on your sewing machine and a 1/4" seam allowance (the edge of the pedal), sew the two fabric pieces together leaving an 8" opening to turn it right side out.
When I need to turn fabrics, I pin all around the fabric, then reverse two of the needles and pin them backwards. Then, using the picture below as a reference, I began at the yellow needle, stitched all around the fabric to the pink needle, back-stitched, stitched to the yellow needle, and back-stitched. Then I just pulled out the thread between the two needles.

 
Step 5: Clip notches out of the corners of your fabric or use pinking shears to do the same thing. Be careful not to clip the stitches!
As a sewing dummy, I strongly recommend you invest in some pinking shears! At my local craft store I got them for 40% off with a coupon and the total price was about $10. Such a good investment and it has saved me so much time and agony by not having to notch out every corner I turn and tuck! For this project I also just cut around the entire fabric to minimize bulkiness, but that probably isn't necessary.


Step 6: Iron the un-sewed portion of the fabric open. This will keep that portion tucked in nicely during the top-stitching in the next step.
Every time I turn a fabric I use this trick. A huge time-saver!


Step 7: Turn the blanket right-side out, top-stitch around the edge of the blanket with a 1/4" seam allowance, and admire your handy-work!
Have fun with the top stitch and use a fun color or a new stitch on your machine! On mine I used a grey thread on top and a blue on bottom and the stitch I used can be seen in the pictures of the straps.


The Straps Portion
 I used velcro to connect my straps because I wanted buttons, and I liked the multi-fabric-layered look, but there are tons of ways to do your straps. Here are some other strap tutorials I found: 

Step 1: Iron all four straps length-wise in half with the right-side facing out. Unfold them and fold the long-ends into the middle and iron again.
Clear as mud, right? Hopefully the pictures can explain better than I can.


Step 2: Place the wider straps with the ends face-up and the thinner straps over-top of them with the ends face-down. The edges of both of the fabrics should match up, but don't stress if it's not perfect.


(The pieces on the left just show you how each of the pieces should look after ironing, and the one on the right shows how they go together.)

Step 3: Sew the two pieces together by top-stitching the lengths of the thinner strips (be sure your stitch is wide enough so it catches both fabrics). When they both strips are secured together, fold the shorter ends of the strips down under and do a simple stitch straight across to finish them off.

This is where I really went rogue with my version because I had a hard time following the other tutorials. Admittedly it's not the most beautiful thing ever, but it's cute, does the job, and the ugliest parts are on the underside of the straps, rarely seen anyway.


Step 4: Sew the velcro onto the ends of the straps. Be sure the opposite ends of the velcro are on opposite ends of the straps. If you can wear it like a bracelet you have the velcro on right! 


Step 5 (Optional Decorative Button):  Sew the button onto the top of the strap through the velcro.


The Putting Everything Together Portion
(This is the hardest part of the project, but it's going to work out, I promise!)

Step 1: Lay your blanket out flat with the side you want on top facing up and position your straps about 12" in from each side (about 8" apart) and about 17" from the top. Pin them in place.
This part takes some guess and check work and can really takes as long as you want to get them as perfect as you want. I got one of my straps where I thought it needed to be, sewed it on, and then folded the canopy in half so I could match the other strap be

 (As you can see, the strap on the right isn't perfectly straight, but I didn't even know that until I took this picture. You really can't tell when it's strapped on.)

Step 2:  After you've pinned the straps on for placement, attach your canopy to your car seat to make sure you have them in the right place. Make adjustments if necessary.
I really wish I knew how to help you more with this portion, but it's really a guess and check type of thing. My only advice is to not stress over perfection, because the biggest lesson I've learned sewing so far is that small imperfections are not noticeable to anyone or are covered up by cuteness anyway.


Step 3: Sew the straps onto the blanket by going around the edges and then making an "x" in the middle for reinforcement. (The picture from this tutorial shows that best.)


Step 4: Attach to car seat, insert baby, and enjoy your handiwork!


Please post any questions you may have and I hope everything goes so well for you and all your sewing projects!

Wednesday, December 5, 2012

Christmas Stockings Unveiled

I know you all have been anxiously anticipating the unveiling of our family's homemade Christmas stockings, I know I have!

I do fear that I may have built them up maybe more than they should be...but here goes nothing!

Photobucket

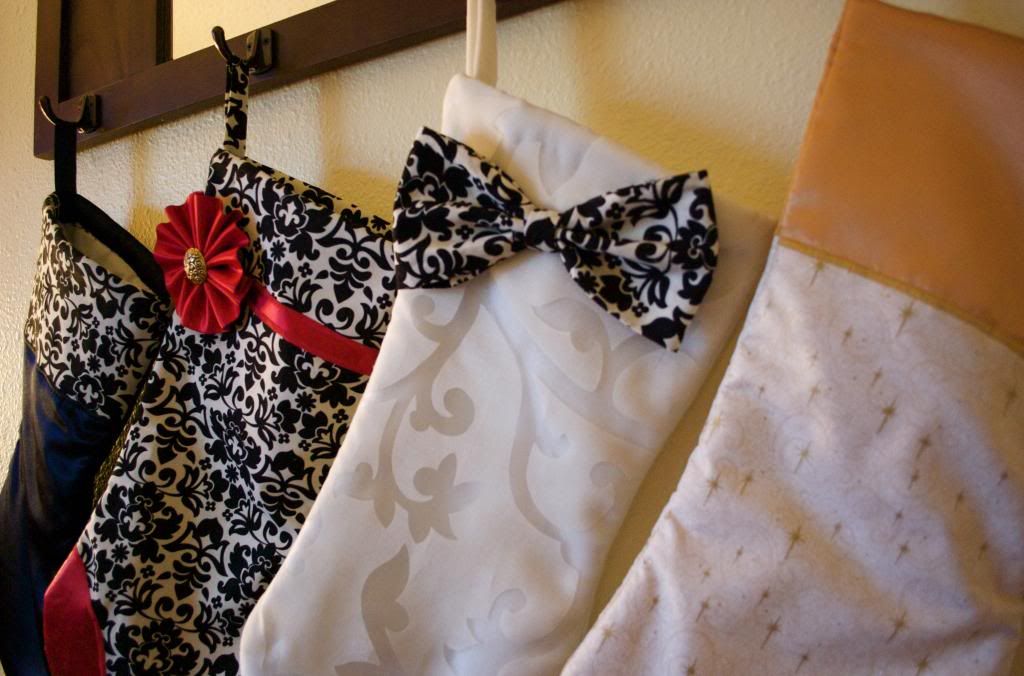
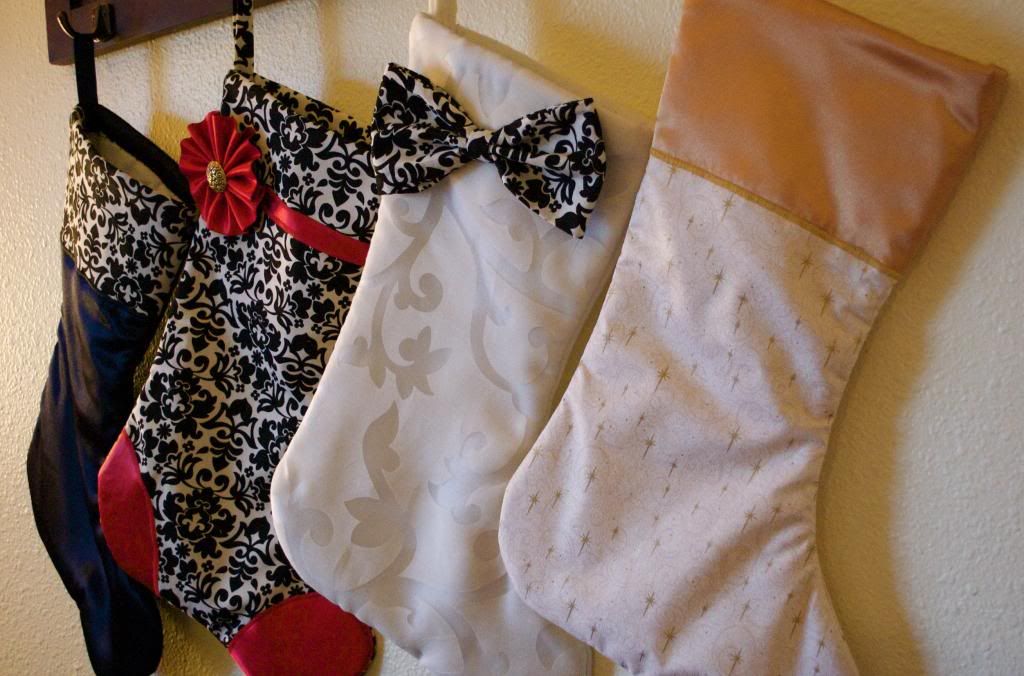
The pictures are definitely a bit wanting in their...greatness...but let me tell you a bit more about these stockings. The blue one on the left is Nick's, the one with the red is mine, the one with the bow is Alexa's, and the last one that looks terribly out of place is Jesus'. The one for The Sneetch is still floating around in my head, hopefully soon to be an actual physical stocking, although I'm debating making a girly one and a boyish one or just a neutral one. My brain has definitely been stretched a bit on this project.

Each of the stockings (aside from Jesus') have three things in common: their shape, that patterned fabric which also matches our homemade tree skirt that I put together last year (pictures to come), and the guiding hand of my friend Lorayne. She's the angel who painstakingly responded to panicked calls/texts/emails when things seemed impossibly desperate and I needed a wise and experienced hand to hold my metaphorical one as I learned how to sew and do this project at the same time. I love her so much -- she is a saint!

PhotobucketHere are some details: Nick's stocking is a fake, but still very elegant, satin fabric. I want our stockings to reflect something that the person would pick out for themselves (as best as I can make them anyway), so I wanted Nick's to be (a) blue, (b) simple/not too cutesy, and (c) classy. His cuff is just appliqued to the front of the stocking, and his was probably the easiest to make.

My stocking is, I admit, my favorite, and was the first one I did with Lorayne watching my every move. I knew what I wanted from the moment I got the fabric, so this was the easiest to plan out and execute. The red details are just appliqued to the front using the same method as Nick's stocking, aside from the rosette and the button which are very delicately hot glued to the stocking. Awesome, I know!

Alexa's stocking is an off-white fleece with a beautiful clearance sheer overlay fabric on the front. Hers is the one I'm least satisfied with because I feel like the bow looks out of place and I don't really know what to do about it. I'd add tails if I knew how to make them look like they were attached to the bow and didn't think they would cover the sheer fabric's pattern too much. Oh well, I've got time to think about it still.

Jesus' stocking was actually originally Alexa's stocking, but when it was mostly done I couldn't figure out a way to incorporate the patterned fabric into it. So I was at a friend's house and her family had a stocking for Jesus that they could put in behaviors to change or actual gifts to give to others each year as a gift to Jesus. I loved that idea and almost immediately realized that was the solution! This stocking will probably not hang over the fireplace with care with the rest of the stockings, but instead in some special place where we can remember the true meaning of Christmas easier.

PhotobucketSo there they are! To maintain their niceness I'm unfortunately going to have to be a little Nazi-ish with our kids and their grubby little fingers as these can't go through the wash. Nick told me that his mom would line the interior of their stockings with bread bags and then the kids could pull out their bags and return their stockings safely/cleanly to their hanging spot. We'll definitely be doing that!

When I make The Sneetch's stocking I think I'll take pictures along the way to show you how I made them and make a little tutorial post. It's probably nothing groundbreaking, but maybe helpful if this is something you'd like to do! Merry Christmas!
Tuesday, December 4, 2012

Attaining Creative Vision

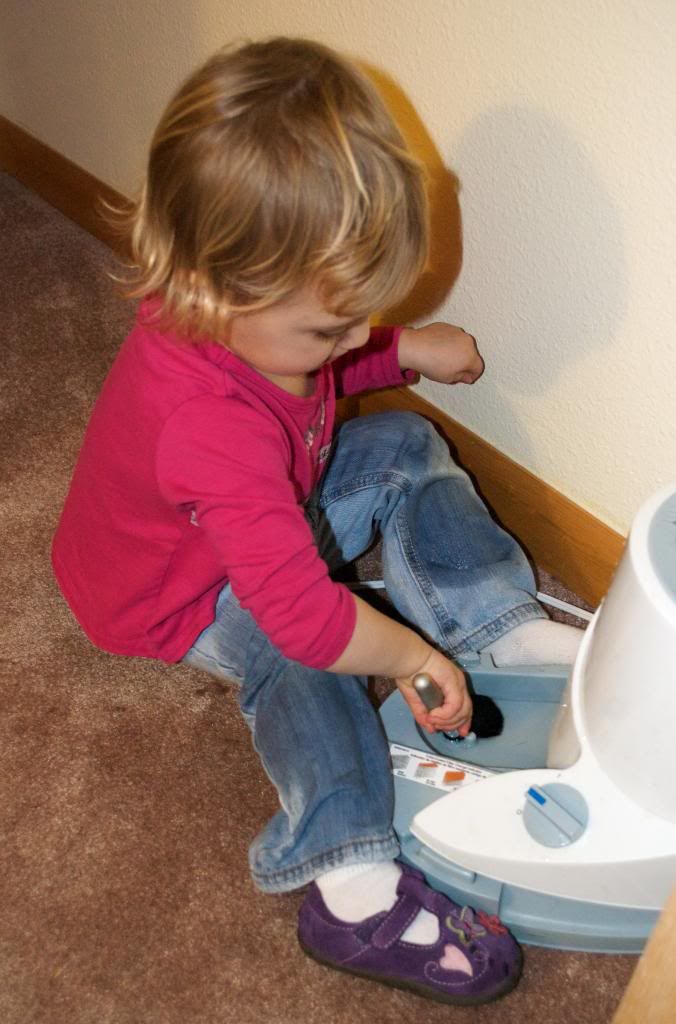
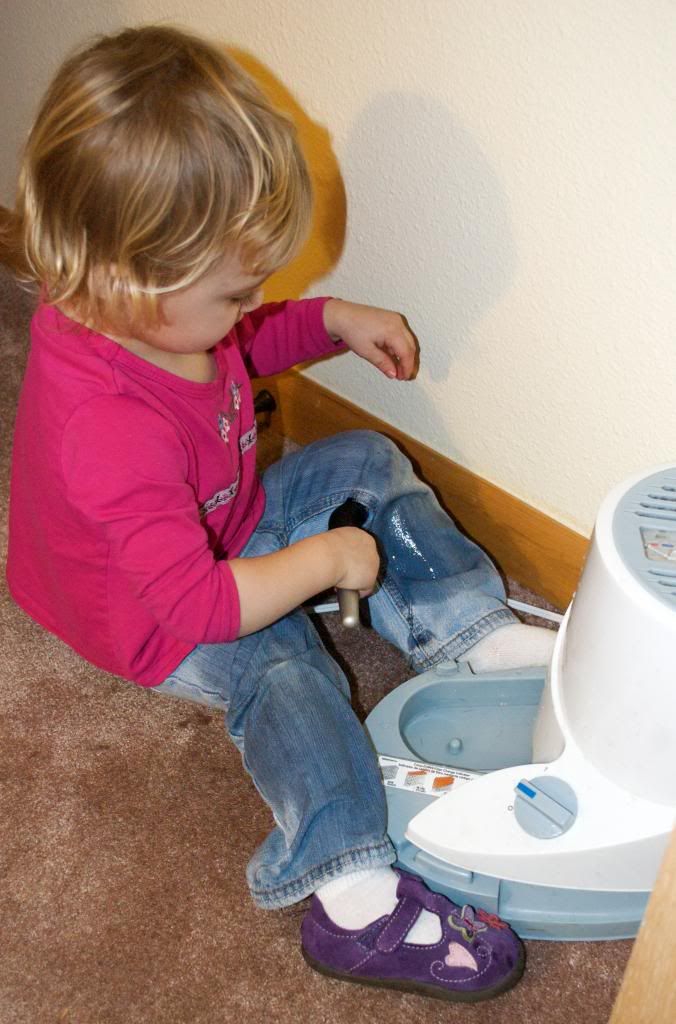
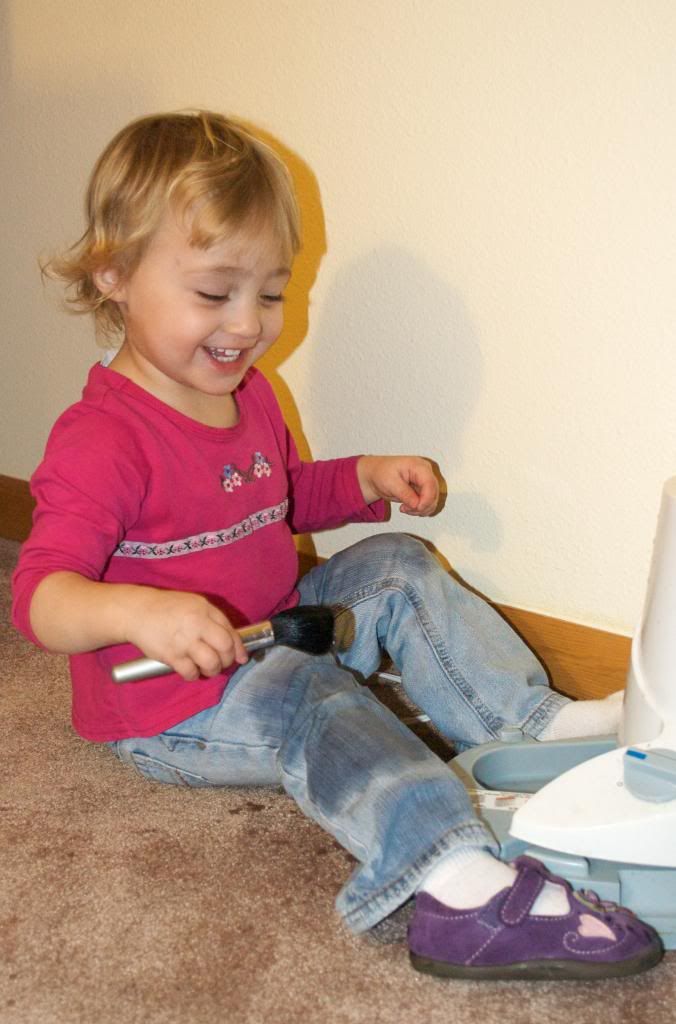
While putting on my makeup the other day, Alexa was intrigued, so I let her play with an extra makeup brush I have. She rubbed it on her face, and then ran off. No problem, she does that a lot. After a couple minutes of silence I thought I should check in on her. I found her in her room, using the brush in a very nontraditional manner.

Photobucket

Photobucket

Photobucket


That's Alexa's humidifier water she's painting all over her legs. Yeah. It's like she was just waiting for the appropriate tool to help her attain the creative vision she seems to have had in mind for sometime.

Toddlers are crazy, and so clever, and even more fun!
Thursday, May 17, 2012

Dreaming and Doing, Pt. 2

Did you know you can re-finish countertops? Our ugly laminate countertops are going to look slightly less ugly because we are going to re-finish them! Probably not until summer, but still super exciting for Nick and I!


Guess who made this little discovery as part of her doing instead of dreaming escapade a few weeks ago? I'll give you a hint, it wasn't this cute little cheesy bundle of craziness:

Nope, it was me! You see, after I had my fill of longing for what I did not have I decided to do everything I could to change my circumstance. That meant I got to work on cleaning, tape measuring, pamphlet reading, and discussing with friends about changes to make in our home.

As a result of those efforts we went on a date to Home Depot and purchased blinds for the sliding glass door (which turned out to be way less expensive than I originally thought), looked into re-finishing our cabinets (which is my next big project right after cleaning out the garage), and then stumbled upon a countertop re-finishing kit (a project we've decided to take on this summer).

Crazy-mixed-up world we're living in these days when working actually yields results. Color me surprised.

Thursday, April 12, 2012

Dreaming and Doing

I have spent more time than I should have in the past few days dreaming instead of doing. Does that ever happen to you? You dream so much and your dreams seem so nice that actually being productive in reality gets in the way. Mostly I've been feeling that all my dreams can't come to fruition right now due to any number of reasons: it's impractical, there's not enough money, there's one too many kids to get things done, there's too many cysts on my ovaries. You get the idea.

Am I the only one that ever feels this way? A bit limited by my circumstances; like my dreams are too big for me to actually do anything about? (For example, I spent a precious naptime on a website last week creating my dream house. I only got through the first floor before I realized what an incredible waste of time the "project" was.)
(Looks cool though right?)

One of my favorite speakers gave me a nice counterpoint on the matter:
"Everyone can create. You don’t need money, position, or influence in order to create something of substance or beauty. Creation brings deep satisfaction and fulfillment. We develop ourselves and others when we take unorganized matter into our hands and mold it into something of beauty...What you create doesn’t have to be perfect. So what if the eggs are greasy or the toast is burned? Don’t let fear of failure discourage you. Don’t let the voice of critics paralyze you—whether that voice comes from the outside or the inside."
I nearly let my own interior critic stop me from making a new meal I had never done before. It was so simple, but because I didn't know one step in the process I didn't actually make it for weeks. On Tuesday I did it! No, it wasn't perfect, but I did it, and sometimes that's the hardest part. The same fear (no surprise it was another cooking ambition) overcame me on April 1st until Nick said "it seems like you are trying to come up with every excuse not to make these. Either do it or don't and move on."


Ya know what? The cinnamon rolls turned out delicious and we ended up taking some to a new family in the area. The question at hand is then, why do I let this inner-naysayer make so many decisions for me, and paralyze me in such a crippling way? Someone once told me to never take advice from your fears. For some that's easy, but it is a constant battle for me to just start something, especially if I haven't done it before.

That same favorite speaker of mine, in a different discourse, said this:
"Let’s make sure to set our 'do it' switch always to the 'now' position!"
Today I am going to do that. I am not going to waste precious time thinking of what could be instead of creating what could be. No, I can't do everything that my clever mind concocts, but there's a lot more I can do as I set out with my "do it switch" in the "now position."

There's a lot more I find can be done, despite my circumstances, when I spend less time dreaming and more time doing.

Thursday, January 19, 2012

DIY Name and Birth Stats Print


Yup, I made that. For Alexa's room. Now, Nick thinks it's a little silly to put "word art" up in a room of someone who can't read it, but I figure decorating her room is not really about her at all at this point in her life. I like it, it's not my favorite thing ever, but it will spice up some wall space no problem.

Happy Thursday!

Thursday, October 13, 2011

Making My Workout Spiritual

The more I study the Gospel of Jesus Christ, the more I realize that it is so profound in its simplicity. It's all about transformation.

Transforming sinners into saints, men and women into Gods and Goddesses, individuals into families, carnal into eternal, and, in this case 151.4 lbs. into 135 lbs.

151.4 lbs is what I weighed in yesterday morning, I think the most I have ever weighed in my life. I honestly don't know if other people can tell I weigh that much (I am quite muscular), but I can sure tell, and I don't like it.

And you know, I've said it before, I can do hard things, and so if I don't like something about my life, I can change it!

I have tried eating healthier and running daily in the past, and the thing with eating well and exercising is that when you do it consistently, it actually works! Two summers ago I weighed 135ish pounds and felt great and got compliments from people on how I looked. I had eating healthy goals and ran 2 miles 5 days a week (I know around here that's child's play, but back then that was a lot for me).

Back then I had been told by my Reproductive Endocrinologist that exercising daily would help the cysts on my ovaries chill out a bit and help the crazy medication he was giving me work better. So that was my motivation when I wanted to be lazy instead of run or when I got tired while running. I would push myself and say "This is for you little baby. I'm going to be better for you. I'm going to run faster for you. I'm going to run harder for you." And so on and so forth. It was all about becoming a mother, which worked as motivation for me back then.

Once we decided that adoption was our Plan A, my running eventually tapered off and became extremely sporadic, and became a decision I had to make everyday instead of one I had already made. For me losing weight cannot be just about the weekly weigh-in, because I won't lose weight everyday/week and sometimes I'm willing to sacrifice a pound or two for a delicious slice of cheesecake or a mountain of French Toast.

This is where making my workout and "diet" (I put it in quotes because 2,000 calories is what I should be eating, I'm just going to be more diligent about it) spiritual is so important. Weight loss goals come and go, but living physically well is a lifestyle, just like living spiritually, emotionally, and intellectually well are. It's about transforming the self that is "acted upon" by cravings and slothfulness into the self that acts upon those things with self-control and determination. (source, verse 14) It's about transforming the self that is eating too often to tidy the house into the self that is able to serve others because the new self has her life in order.


I'll share more about the specifics of my workout and diet plan soon, I just thought I would pontificate upon some of my thoughts as of recently in regards to my body and how I am trying to accept it for what it is as well as make it the best I can! And as a parting thought, here was something I found extremely funny on Pinterest the other day. Enjoy!


PS As a little bonus, if I continue to get up at 6am daily and workout 6 days a week, I get to cross off a couple goals from my 101 in 1001 list. YAY!

Thursday, September 8, 2011

Thursday Latelies: A Video Post

I'm video blogging today, and it's not even of Aly (don't let that deter you though)! Please don't laugh at me too much, but I hope you enjoy yourselves!


Here is a link to Bex's blog. And of course it's short for Becky...silly me.
Here is a link to the scarves I found on Amazon! So cute!
Here is a link to the pictures of Aly and Molly. They are so freakin' adorable!
And I forgot to mention about the jewelry board, it's covered with cheap-o fabric and ribbon from Hobby Lobby. Don't you love how everything there is like always 50% off?!

PS Isn't there something about seeing the person talking to you that makes you feel more connected with them? And doing this made me feel more connected with you, so that's double prizes!

Wednesday, July 13, 2011

Living Up to My Privileges

Yesterday I spent a lot of my time making excuses for myself. Creating reasons why things were not cleaned, or ironed, or cooked, or read, or done was not the kind of daily creative energy I want to be putting forth. I had some good moments, but far too many excuses.


And none of this "you're a new mom, don't be so hard on yourself" nonsense. My baby takes naps, so at the very least I could be using that time to be productive instead of casually taking an hour to make and eat lunch and then another hour waiting and worrying Alexa will wake-up far before she should. It's silly nonsense, and it needs to stop.


This declaration is accompanied with many goals I have set for myself on a daily basis, and I can never seem to get all of them accomplished. So then my question for myself is: Am I a perfectionist that asks to much of myself or am I simply not living up to my privileges? 

Perhaps a little of both, but honestly, and unfortunately, I think it's far more the latter.


I mean, how many women do you know have a Master's degree and get to be a stay-at-home mom? I can only think of one, which may reflect my lack of knowledge of my friends' educational backgrounds, but I think it also means I am one blessed little lady. I love to learn and read and should be sharing that love with my daughter through my own literary pursuits as well as reading with her more often.


How many people do you know who have parents and in-laws who have strong, stable, and committed marriages? What a blessing this is to have two sets of parents who love their spouse, family, and God to thrive in a marital relationship for nearly 30 years each! I should be applying their expertise, knowledge, and examples in my everyday life.


Just these two sets of privileges require me to make some decisions on good, better, and best ways to spend my time. Seriously, how often do I need to check Facebook, play with Pinterest, read blogs, and watch movies or TV shows on Netflix or Hulu? Not nearly as often as I have been, that's for sure. I feel like there's so much more to say, but let's save some action for future posts. I will leave you with this thought that's been rolling through my mind lately: